Monday, December 22, 2014

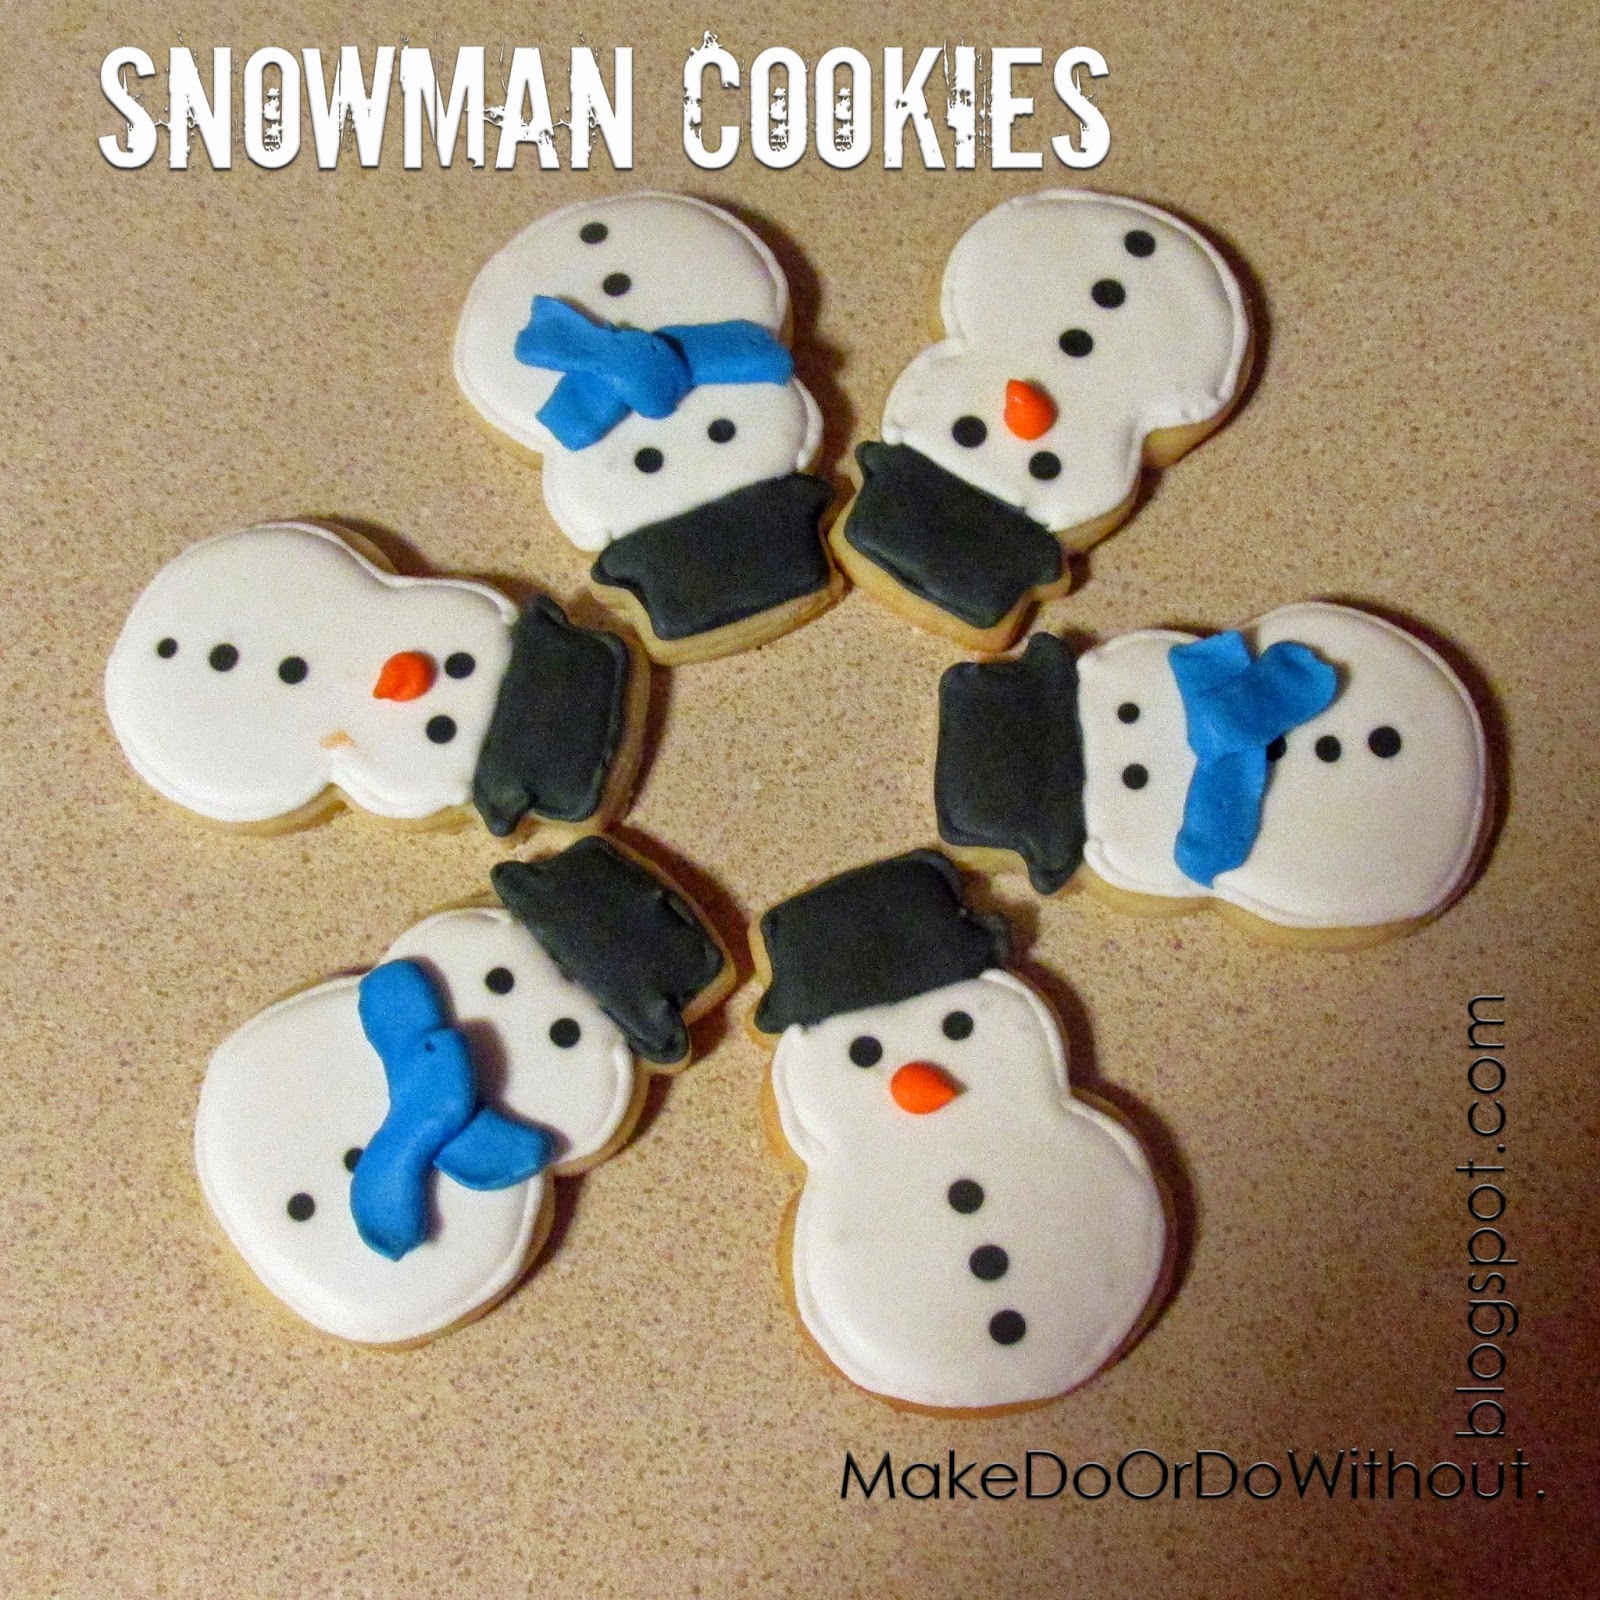
Cute Snowman Cookies

Although we have absolutely NO snow on the ground here this December (which is highly unusual!), I decided to make snowman cookies.


Here's a quick tutorial for icing the snowman cookies.  Start by outlining then filling the hat (I used black).  Then outline the snowman with white.  When you fill the snowman with white, use black icing to drop dots for the eyes and buttons (before the white icing dries).  Then you get nice, flat dots.  After that has all dried, add your embellishments.  I did a simple carrot nose on some, and a blue scarf on others.


Hope you enjoy these!  And may all your Christmases be white.


Tuesday, December 2, 2014

Harry Potter Themed Necklace


It's no secret that I LOVE Harry Potter.  My niece is a fan, too, so I made her this necklace for her birthday.  You can make one too!

Supplies Used:
Deathly Hallows charm - I ordered these from amazon.com (click here for link)
Owl charm - I think I ordered these from Oriental Trading, but it was so long ago, I've forgotten (click here for similar)
Mischief Managed pendant - I made this using Base and Bling products from Close to My Heart.
Chain - a Close to My Heart Base and Bling product.
Jump Rings

For the Mischief Managed pendant, I found the artwork online and printed it out so it would fit in the 1" circle pendant.  I cut it out using a 1" circle punch and fit it into the pendant base.  Then I used Liquid Glass to adhere the round glass cover over the paper.  It's so easy!  I checked out this video tutorial for the how-to.

I liked the result so much, I almost kept this necklace for myself.  I guess I'll have to make another one!

Wednesday, August 20, 2014

Lord of the Rings Birthday Party

Spencer just turned nine years old and we threw him a Lord of the Rings party. He does archery, so a lot of the inspiration came from Legolas and the other elves who use bows.

Here's the invitation:

I decorated the kitchen with some "trees", a birthday banner, and quotes from the books.

On the table is a basket with gold plastic utensils wrapped in brown napkins. I held the napkins around the utensils with little gold rubber bands from my kids' Rainbow Loom stash.  I saw that trick at a graduation party and thought it was genius.  It's so easy to find a color to match your party and they are just the right size!

The trees are pool noodles that I covered with brown paper lunch sacks.  You cut the bottom off the lunch sack and slide it over the pool noodle and scrunch it down.  Then you add another sack over-lapping the first, on up the tree.  Then I stuck some faux greenery that I had into the hole on the top of the pool noodle.  To make the trees stand up, I threaded the pool noodles over some old speaker stands we had.  But the speaker stands weren't tall enough so I had to use fishing line to attach the tops of the trees to the curtain rod as well.
The banner says "Happy Birthday Spencer" and I made it using my Cricut keeping with the gold, browns, and greens.
 The other wall held a collage of movie pictures with famous quotes.  I found all of the images (including the Middle Earth map) online and I looked up the quotes in the books. Accuracy is important to us nerds.


In the living room, I removed the curtains from the curtain rods and added two Lord of the Rings banners - one from Rohan and one from Gondor.
For these, I raided my fabric stash and dusted off my sewing machine.  I finished the raw edges of the green and black banners and made the rod pockets at the tops.  For the designs, I free-hand drew them on the white fabric with a pencil and cut them out.  I hand-sewed on all the pieces for the horse head.  But then I decided that took too long and I just glued the tree pieces on the Gondor banner.  Also for the tree, I only drew one half of the tree, folded the white fabric in half the long way, and then cut out both sides of the tree so it would be symmetric.  Just like how we all used to make hearts out of pink construction paper in elementary school.  I plan to hang these banners in Spencer's room after the party.

Outside, where all the activities took place, I made a Mount Doom on the shed using plastic table cloths.  They used that for some of the games they played.  Here's the birthday boy tossing the ring into the fires of Mount Doom.

 I made him the elven cloak out of some old curtains. (How very Sound of Music.) And ordered the leaf brooch from Amazon.  I'm sure my boys will use it for many Halloweens to come.

Now on to the party activities!
I had a station set up where they could make The One Ring To Rule Them All out of oven-bake clay.

My  husband led several ring tossing-type games.  This one, they were trying to get the hula hoops around the cones.

I can't tell you the exact rules of the games, because he just makes this stuff up as he goes based on what the boys are interested in.  Mad skillz, that one.

Then we armed them with cheap dollar store bows and arrows and let them run around playing Elves vs. Orcs.  They took this very seriously.

Time for food!  I served regular food and tried to give it a Lord of the Rings-ish name.  The coolers that held the drinks got fancy signs, though.

Then it was time for birthday cupcakes!  Chocolate cupcakes with fire frosting!

Here's how to make the fire colored frosting.  Mix up some red, orange, and yellow buttercream icing.  Splat the three colors of icing onto a sheet of plastic wrap like in the picture below.  Roll up the plastic wrap into a tube.  Insert the tube into a large leaf decorating tip (I used 1M).  Then insert that into a decorating bag.  Pipe the swirls onto the cupcakes.  It's kind of tedious, but it looks really cool when you're done.


After opening gifts, we sent everyone off with a Lord of the Rings themed treat bag.  They got One Ring (Pop) To Rule Them All, some Swedish Fish (raw and wiggling just how Gollum likes them), and a glow stick from Lady Galadriel.  They also got to bring home the rings they made and one of the bow & arrow sets.

Whew!  That was an epic party!  Good thing his birthday is in the summer when there isn't much else going on.  Happy birthday, Spencer!

Sunday, June 29, 2014

Wilderness Escape VBS Day Camp Decorations

Our church has a week-long program for the kids with a VBS-type morning (songs, crafts, Bible lesson, games, snacks) followed by a field trip each afternoon (rollerskating, bowling, zoo, mini golf & swimming).  It's an intense week!

I was asked to help with decorations and this year's theme used the Wilderness Escape curriculum from group.com.  It was all about Moses and the Israelites in the Wilderness.

The first thing I did was make the Registration Table a little more exciting to drum up some enthusiasm in anticipation for Day Camp.
The background is blue bulletin board paper and I painted some clouds on it for the "sky".  Along the bottom is some scrunched up kraft paper for the "land".  We raided the storage room for various plants/trees and set those alongside the background and on the table.  You can't see in the photo, but I put some blankets on the floor under the table and added some props like a jar, some baskets, rocks, grapes, things like that.  We re-used a lot of this stuff in other areas during Day Camp week.

Then Day Camp week arrived.  We decorated the foyer area where the kids arrived so they'd be greeted with a glimpse of the theme.  It makes a big difference, doesn't it?

The doors led to our Israelite camp, so I made a sign and hung some fabric over the doors.  Some of the boys made a directional sign (broom handle in a bucket of sand with cardboard arrows) pointing to the Promised Land, Egypt, Mount Sinai, and the Red Sea.  The church already owned the working waterfall which was reminiscent of Moses getting the water out of the rock, so we just jazzed it up with some more plants from the storage room.  I strung some rope around the plants and added a drop cloth on the floor to discourage kids from climbing on the fountain.


The campers then were assigned to one of 12 tribes and gathered at their tent in the gym.  We already had the tents from a previous year when we had a western theme, so that was easy.  I made banners using kraft paper and a different color of duck tape for each tribe.  We also stuck the duck tape on the floor to delineate each tribe's area.

The opening program took place in the main sanctuary every day and we made a stage set to look like mountains with a tent in the foreground. I didn't get a very good picture of it, but here it is in action.
We had the 8-foot backdrop boards and painted them to look like a wilderness mountain.  The little parts of the mountain that stick up above the boards were made from foam insulation board. The boards were set on some risers to give them more height, and we covered the risers with drop cloths.  The tent was made from an EZ-UP tent covered with drop cloths.  Again, we raided the storage room for palm trees and set those around, and made a little campfire with real logs and rocks.

The Bible story was supposed to take place in Moses' tent, so I transformed one of the nurseries so it felt like you were in a tent.  This was a lot  more time consuming than I thought it would be.
We attached some zip ties to the supports for the drop ceiling, tied rope to those, threaded the rope through PVC pipes, and draped fabric from it.  Our church fortunately owned the fabric already because it was a lot of yardage!  For the back wall of the tent, we attached more white fabric to the drop ceiling supports using binder clips.  Binder clips also helped close some of the gaps between pieces of fabric.  Then we threw various sheets/blankets/rugs on the floor and added some accessories (from the registration table) to complete the look.  We re-wrote parts of the curriculum to add more drama and characters to make the story come alive for the campers.

One of the days, the campers crossed the Red Sea.  This was a fun project to figure out.  We used two rolling room dividers to make the Red Sea in the hallway.  When the campers first approached, they saw the land and and sky (re-used from the Registration table) and the blue fabric was spread across the hallway like it was the water.  Then  Moses parted the sea (some helpers rolled the one room divider across the hall) and the campers walked between the room dividers covered with blue tarps made to look like walls of water.  Also, as the room divider was pulled across the hall, a drop cloth was pulled along with it, creating the "dry ground" between the walls of water.
I had a ton of help with this, so the main set up only lasted one afternoon.  It was the first time I had done something of this scale, and it was a fun challenge!

Monday, March 3, 2014

Cardinal Cookies

Normally this time of year, it's starting to look like spring.  But this year we still have several feet of snow on the ground!  In honor of the hearty cardinals that stick around up north all year adding color to the white landscape, I decided to make some cardinal cookies.


Usually, I use the outline-and-flood method for frosting my sugar cookies.  But I decided to try something new: 20-Second Icing.  Sweet Sugarbelle has a fantastic tutorial on achieving this consistency, somewhere between outlining and flooding consistencies. (click to see tutorial)  Using 20-second icing, I can eliminate decorating bags and just use squeeze bottles. It's a lot faster!  The frosting is runny enough to flow nicely and dry smoothly, but it's stiff enough to stay where you put it.


By the time I finished adding the wings, the beaks were dry enough to outline in black.  I waited about a half hour before frosting the rest of the bird to give everything else a chance to dry a bit.  It doesn't have to be completely dry, just dry enough to not flow together.


20-Second Icing wasn't the only new thing I tried for these cookies.  I tried making them gluten-free.  I've made a couple other attempts at gluten-free sugar cookies with disastrous results.  These are actually pretty good.  I'm going to tinker a bit more with the recipe to get the taste a little sweeter and less dry before I share the recipe.  Stay tuned!