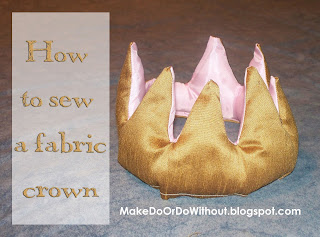
My niece is going to turn two years old soon and we are planning a pink and gold party. I thought she'd need a pink and gold crown to wear at her party. I had made a couple blue and gold crowns for my sons when they were younger, so I used the same technique here.
The first step is to make a pattern. I had a foam crown from Oriental Trading that fit my boys' heads and I traced it on to tracing paper to make a pattern.
Cut one each of gold and pink fabric. To make sure my crown ended up looking symmetric, I folded my pattern in half and I folded my fabric in half. Then I pinned the pattern to both pieces of fabric at once with the fold of the pattern on the fold of the fabric. Both of my fabrics were thin so cutting through four layers at once wasn't a problem. (I got my fabric from the remnant bin at JoAnn Fabrics because you need less than 1/2 yard of each color.)
Lay both pieces of the fabric crown, right side down, on a hard surface. Fold up the bottom edge of both pieces a 1/4 inch or 1/2 inch and iron it so it stays put.
Pin the right sides together and sew around the whole crown except for the bottom edge. Leave the bottom edge (where you ironed the hem) completely open. After sewing, trim the tips off of the crown points close to your seam. Then turn the crown right side out.
Stuff the crown lightly, using a pencil to push the stuffing up into the points.
Pin bottom sides together. Topstitch along that bottom edge sealing up the crown.
Sew strips of velcro on the ends of the crown to hold the crown closed. (If you want a neater crown you should sew the velcro on the pink and gold pieces of fabric before you sew the crown together.)
And you're done!
I can't wait to see my niece with this crown perched on her blond curls!


No comments:
Post a Comment